Paperless animation is the modern approach to hand-drawn animation. Where once every frame of a character’s movement was drawn on paper, and then inked on cels or scanned into software for the final ink and paint, animation is now more often done directly using digital graphics tablets. One recent example of ‘tradigital’ paperless animation was Sergio Pablos’ film Klaus (2019), which was animated using Toon Boom Harmony. Whether you animate on paper or use a graphics tablet, the same basic principles of animation apply.
Toon Boom’s remote training course on paperless animation provides an introduction to paperless concepts, guiding students through everything from how to use Harmony’s workflows for rough animation, cleanup and colouring to looping, layering and prop interaction. In the final project, students apply every concept they learned in the course by animating a portion of a complete scene, including dialogue and lip sync. Below is a commissioned example of that scene, which was animated by Mik Kirchheiner, an animator and story artist from Denmark. We caught up with Mik to learn about his journey into paperless animation, and how he approached animating the example scene below.
Could you start by sharing with us your animation background?
Absolutely. My journey into animation started with my general studies, which I pursued at home in Denmark. I attended The Animation Workshop/VIA University College (TAW), which is located in Viborg, Denmark. They teach animation, visualization and graphic storytelling. I graduated from there in 2017 with a bachelor in character animation, and then began interning at Cartoon Saloon, which is an Irish animation studio. It was an exciting internship for me because I had the opportunity to work on The Breadwinner (2017).
Following that internship I worked on Big Hero 6: The Series alongside many of my previous classmates, and then eventually went to England to work on a few cutout series at Brown Bag Films Studios. I’ve done some freelancing work for you, Toon Boom, and I’ve also since done some teaching at The Animation Workshop. Right now, my main gig is with Yowza! Animation.
So at what point in your education or career did first encounter the paperless technique, and learn it yourself?
Learning paperless is part of the curriculum at The Animation Workshop. My first year there, I learned traditional animation, both paper and paperless. This included doing several projects to get familiar with the pipeline for traditional animation, as well as the 12 principles of animation. After that first year the course transitions into 3D animation. By third year we were working on our graduation films, and the film I worked on was done in paperless animation.
I’m curious about the transition from drawing on paper to drawing digitally. Does this present challenges to artists who are used to drawing on paper?
Luckily the shift from hand-drawing to drawing digitally was smooth for me, probably because I had a little prior experience in other software. I have seen other artists struggle a bit with the transition, but it’s usually just about getting over the initial changes. I believe most artists can adapt to the digital medium quickly.
The first challenge of this transition is technical. You need to understand the ins-and-outs of the software you’re using. Of course, this is easily overcome with time, as you learn more about the software tools, but experience with other software helps you pick it up quicker as you can compare their differences and similarities. You can take a course, like Toon Boom’s, or watch tutorials online to figure out the software.
The second challenge is more related to medium. Drawing on a tablet feels different than drawing on paper. For example, when you draw on a screen there isn’t the granular, scratchy feeling of grip that you experience when drawing on paper, and the smooth surface of the tablet can cause you to lose some of the control that friction gives you. When I first started drawing on a tablet, I taped a piece of paper on top of the screen to add texture and familiarity to the experience. That piece of paper eventually ended up ripped as I wore through it, but it was a good way to recreate the feeling of drawing on paper! It wasn’t too long before I adjusted to drawing directly on the screen, but it helped me get used to one thing at a time.
You’ve worked on a number of paperless projects. What is it that attracts you to working in this style?
I’ve always loved animation because of how it allows artists to study and use the body as a medium for expression. With paperless especially, I find that the expressiveness can be explored down to every detail because you have more control over the scope of the animation process.
For example, with cutout animation the limitations of the rig make many decisions for you. All rigs are going to come with their own set of limitations that you have to work within and both in terms of ensuring that the character looks like itself, but also technical limitations that can limit the expressiveness of a piece of animation. I’ve had situations where I wanted to push a pose but doing so led to visual errors, meaning I had to scale back my initial intentions for the animation. Cut-out of course can be very useful, especially because it can often speed up the animation process dramatically by eliminating the Clean Up and Colouring stages.
Frame-by-frame paperless animation takes longer, but the interfacing is done more directly through the artist rather than through a rig. You do it all: The rough drawings, clean drawings, every single line is put down with purpose. I love that with paperless I have the artistic freedom to draw every single frame. For me that means I can better control the expressiveness of a character, and easier implement that into my animation.

Are there other advantages to paperless that are worth mentioning?
One advantage is that it speeds up workflow. Of course, it isn’t quite as fast as cut-out, but compared to traditional animation paperless is much more efficient. You don’t lose time scanning drawings in and testing them because they’re already digital. You can simply draw your animation and play back your line test right away.
Paperless also allows you to do iterations and edits as you’re working. Drawing on paper for traditional animation is often a very destructive process. You can’t do too much erasing, and sometimes you end up having to throw drawings away entirely and re-start. With digital drawing you can edit your work as you go and quickly make duplicates if you want to try out an alternative approach.
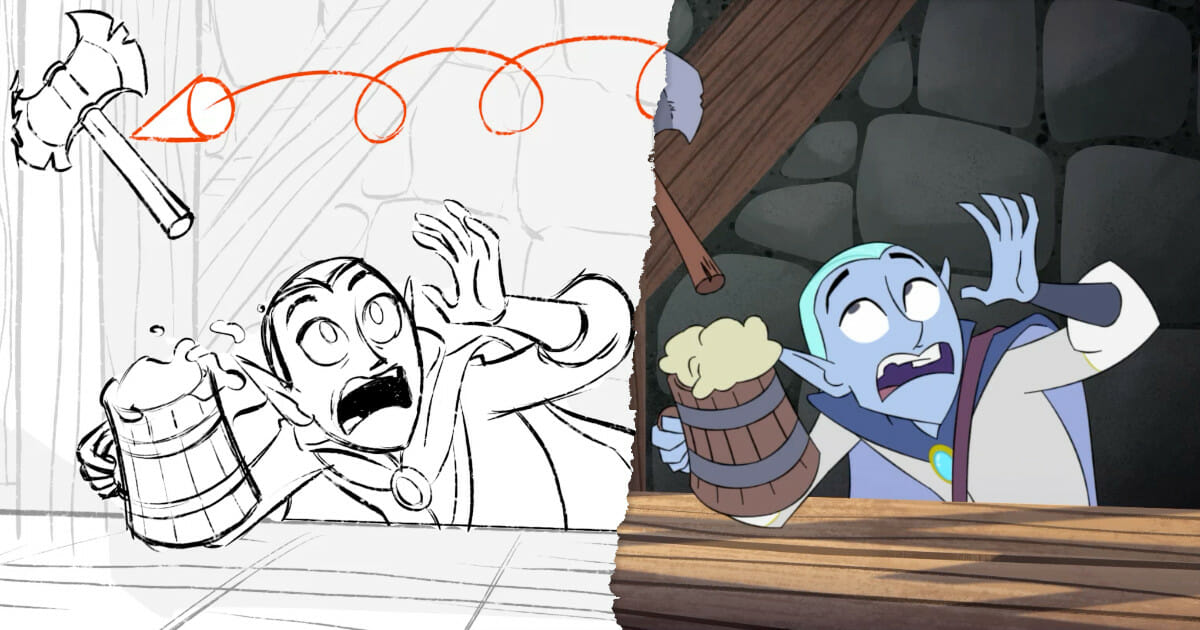
Can you tell me about the process of creating the tavern scene. How did you approach it?
For the tavern scene I was given a rough model sheet with a background and an animatic that had already been done. To get started, I listened to the scene’s dialogue a bunch of times. This gave me a feel for the scene’s story, the emotional pitch, what happens and when. By doing this I can figure out what part of the scene’s acting is most important to focus on in the animation.
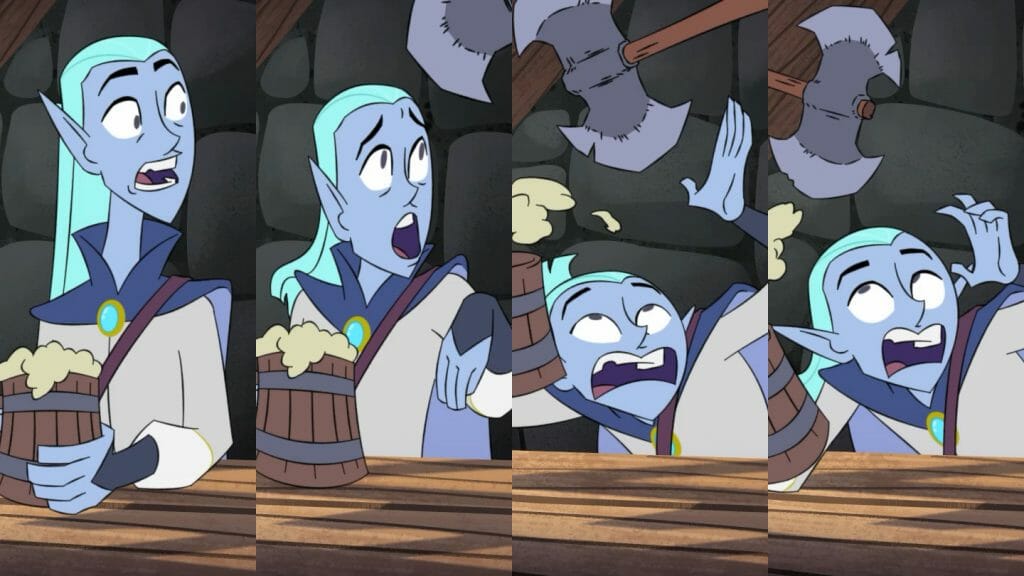
I then did a posing pass, mapping out the fewest poses I needed to tell the scene’s story. I love the pose in the animatic where the character crouches down to avoid the axe, and his eyes get super wide for a moment. In doing my posing pass I knew I wanted to preserve that pose. When posing a scene it is important to think both about what is worth changing but also what is worth preserving from the animatic you’re given.
Once the main poses were decided on, I started on the keys. I decide on how the poses and expressions of the character should look in the most important moments, finding ways to elaborate on the story as it’s told through these poses.
From there I did a rough pass. I looked at what I had already, and then started with animating the hands and the head. This stage in rough can look pretty awkward because I like starting with the head. So during this stage there was just the character’s head floating in a choppy motion…
Once I had my paths and arcs for the head down I got to work on the body. I made sure it was on model on the keys. From there I went in between the keys and broke down the motions into smaller and smaller chunks, starting with the few drawings that best describe the motion. Following that, I did another quick pass on the model to make sure the proportions were looking as they should. Once I was satisfied with the proportions, I could then jump into cleanup.
I find that with cleanup you risk going on autopilot because it’s generally such a simple, repetitive phase. I also find that cleanup initially tends to take away some of the expressiveness of the rough’s imperfections, but usually the final product makes up for it. I was given a colour palette reference for this scene, and so I used that to make the palettes to do the colours.
What was your approach for the props, such as the rotating axe, to this scene?
I used pegs in Harmony to animate the props. For example, to animate the axe I drew a drawing of it, put it on a peg, and then made sure it was travelling across the screen and rotating at the speed I wanted it to go. Then I went in and added drawings as necessary to change the perspective on it as it moves relative to the camera. I like to keep props on their own layers and pegs as far as possible as it allows me to easier tweak or change them if I need to later.
You split the character into three layers, and merged those layers once he stood up. Can you explain why you took this approach to layering?
This was mostly dictated by the mug and the table. The character sits behind a table, resting their arms on top of it, so the easiest solution here was to make sure the arms are on their own layer, on top of the table’s layer. The action of the shot dictated that the mug had to slide in from screen left and be caught by the character, with both of them then coming to a rest.
I ended up putting the hands on their own layer whenever they were on top of the mug, in order to make sure everything was layering correctly. Once the character stood up the whole character was behind the table and the mug was no longer in use, so at that point I just did the rest of the animation on the layer that had the head and body.
What would you say the value of this particular exercise is for an artist who is learning paperless animation?
This is a short exercise, but it does a great job of leading an artist through all the stages of paperless animation: posing, keys, rough, coloring, complex layering, working with dialogue and more. It gives artists a big-picture understanding of the paperless pipeline and how to approach what would otherwise be a pretty common type of shot. This is super valuable because learning a production minded approach helps you once you start actually using this in a professional production pipeline.
I think learning the paperless process is valuable not just for the sake of knowing the paperless technique. It is the most approachable way to learn Harmony and when you learn Harmony in the context of paperless, you still gain some insights that can later lead to mixing of techniques and Harmony tools.
Interested using Toon Boom Harmony for your next project? Mik Kirchheiner animated the example for the tavern scene in the Toon Boom Training Course for Paperless Animation.